Voronoi cell visualization
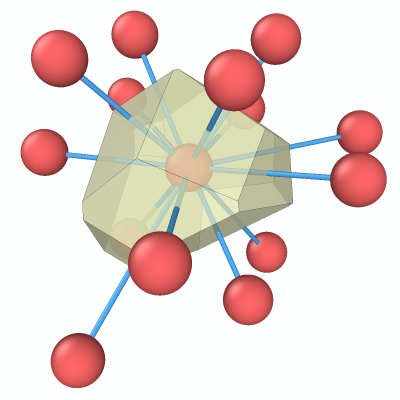
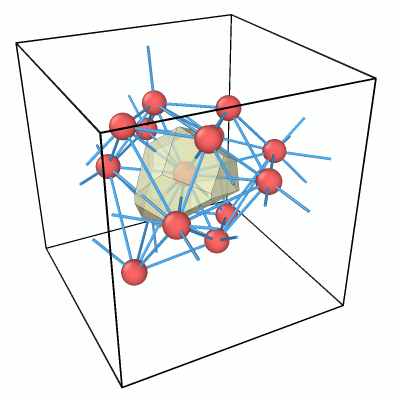
The final result of this tutorial: one Voronoi cell together with the central atom, its nearest neighbors, and the bonds connecting them.
This step-by-step tutorial teaches you how to visualize the Voronoi cell of a single particle in a 3D atomic structure using OVITO. Starting from an amorphous structure, you will compute the Voronoi tessellation, isolate the polyhedron belonging to one specific atom, and display it together with the atom’s nearest neighbors and connecting bonds.
You will learn how to use the Voronoi analysis modifier to generate Voronoi polyhedra and neighbor bonds, the Expression selection modifier to select specific particles, bonds, and mesh regions, the Expand selection modifier to include nearest neighbors in a selection, and the Delete selected modifier to remove unwanted elements from the scene.
Step 1: Load simulation file
Start by downloading the simulation file
amorphous.dump
to your computer. This file contains an amorphous atomic structure. Use the function
to open the file amorphous.dump in OVITO.
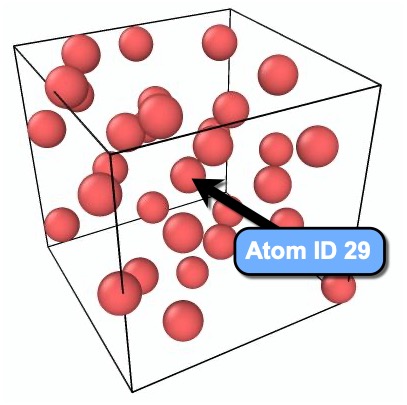
The goal of this tutorial is to visualize the Voronoi cell of the atom located near the center of the simulation box, which has particle ID 29.
Step 2: Voronoi analysis
Next, insert the Voronoi analysis modifier into the data pipeline:
Open the Add modification… drop-down and select Voronoi analysis from the Analysis section.
In the modifier’s parameter panel, activate the Voronoi polyhedra output option. This instructs the modifier to generate a surface mesh representing the Voronoi cells of all particles.
Also activate the Neighbor bonds option. This generates bonds between neighboring particles that share a Voronoi face.
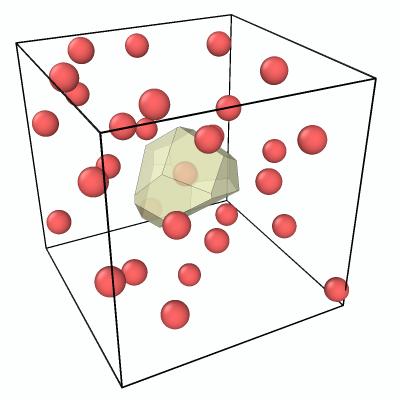
After the modifier has been applied, you should see the Voronoi tessellation overlaid on the atomic structure in the viewport:

Step 3: Inspect the Voronoi cell
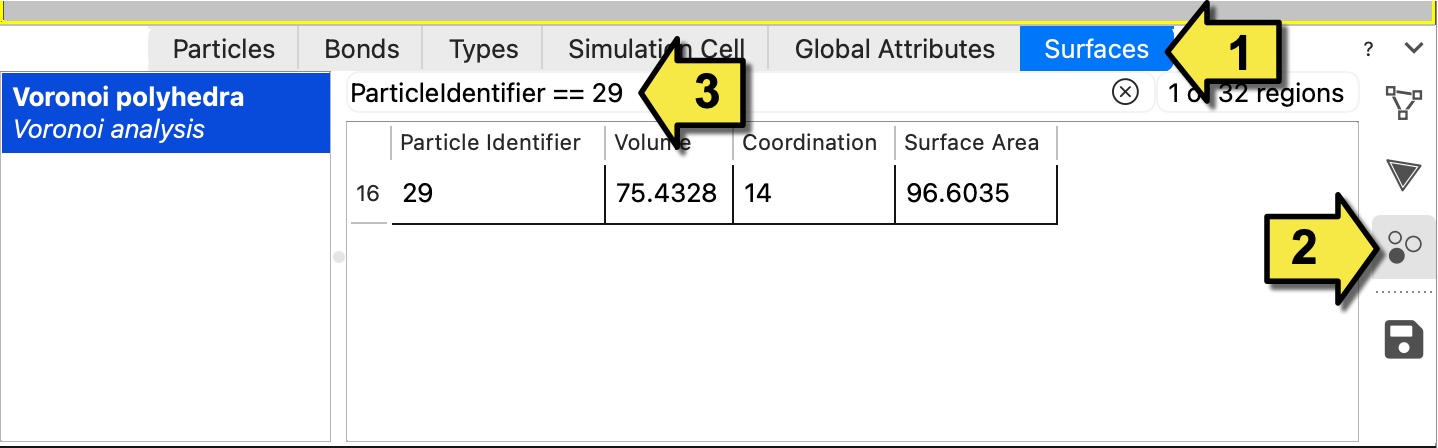
Before we isolate the Voronoi cell of particle 29, let us first inspect its properties using OVITO’s Data Inspector. The Voronoi analysis modifier computes several properties for each cell, such as its volume, surface area, and number of faces.
To look up the properties of the Voronoi cell belonging to particle ID 29, open the Data Inspector panel at the bottom of the OVITO window:
Select the Surfaces tab.
Click the Regions button in the right toolbar to switch to the sub-tab that lists the individual Voronoi cells and their properties.
Enter the filter expression
ParticleIdentifier == 29into the search field at the top to show only the row corresponding to the Voronoi cell of particle 29.
Step 4: Delete unwanted Voronoi cells
The viewport currently shows all Voronoi cells at once, which is too cluttered. To isolate the cell of particle 29, we will first select all other Voronoi cells using the Expression selection modifier and then delete them.
Insert the Expression selection modifier into the pipeline:
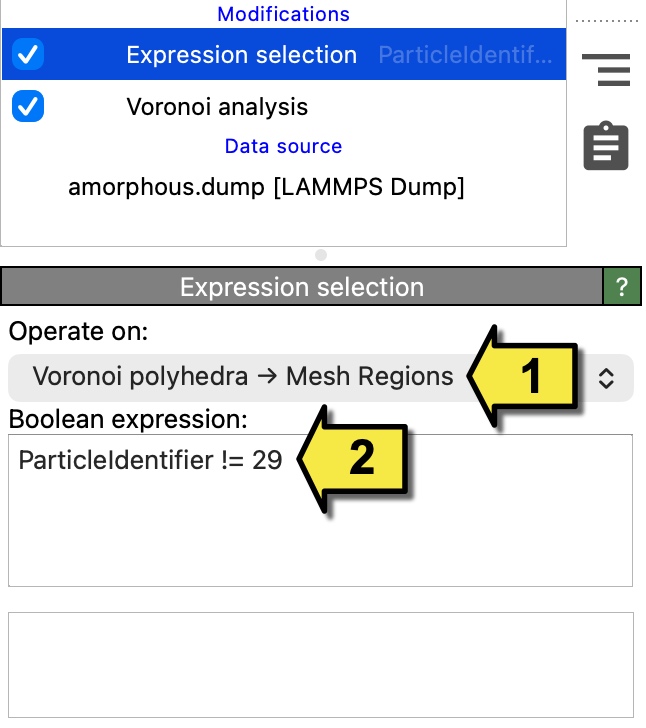
In the Operate on drop-down box, select Voronoi polyhedra –> Mesh Regions as the data element type to operate on. This tells the modifier to evaluate its expression for each Voronoi cell (mesh region) rather than for each particle.
Enter the Boolean expression
ParticleIdentifier != 29. This selects all Voronoi cells except the one belonging to particle 29.
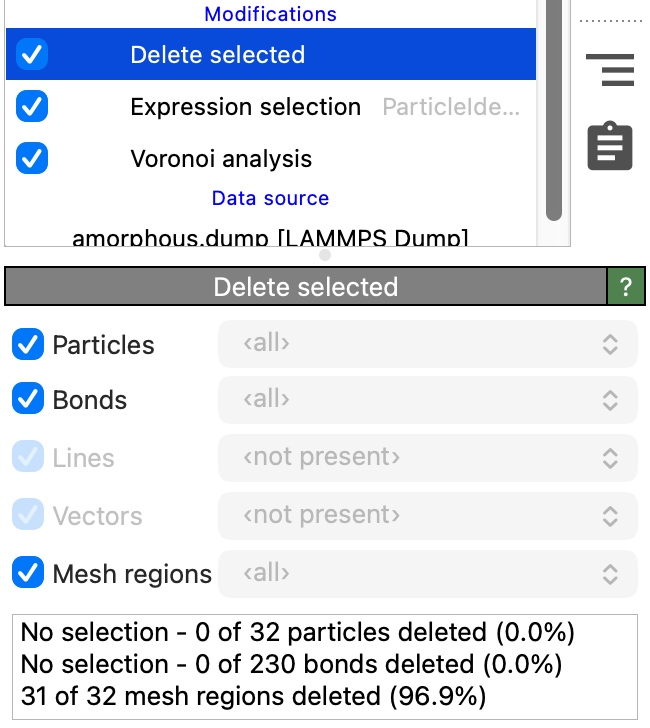
Now insert the Delete selected modifier to remove the selected mesh regions from the scene. Make sure the modifier will operate on data elements of type Mesh regions by checking the corresponding box.
After applying both modifiers, only the Voronoi polyhedron of particle 29 remains visible:
Step 5: Show only the central particle and its nearest neighbors
The Voronoi cell is now visible, but the viewport still shows all particles in the system. To clean up the visualization, we will keep only the central particle (ID 29) and its nearest neighbors, i.e., those atoms that share a Voronoi face with it.
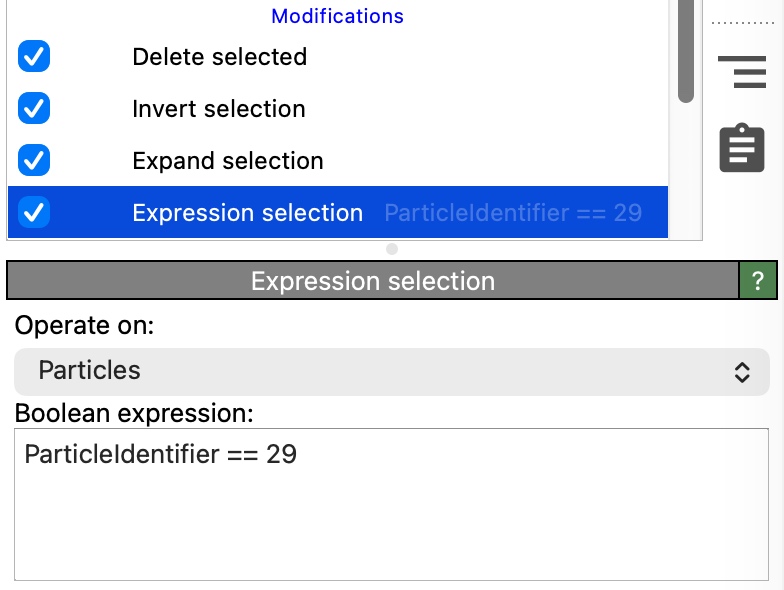
Insert another Expression selection modifier (this one operating on Particles). Enter the expression
ParticleIdentifier == 29to select the central particle.Insert the Expand selection modifier. Set the expansion mode to Bonded. This extends the selection from particle 29 to all particles that are connected to it by a bond. Since the Voronoi analysis modifier generated bonds between Voronoi neighbors in Step 2, the expanded selection now includes exactly the nearest neighbors of particle 29.
Insert the Invert selection modifier to invert the selection. Now all particles except particle 29 and its nearest neighbors are selected.
Note that you do not need to insert an additional Delete selected modifier here. Simply make sure to place the three new modifiers before (below) the existing Delete selected modifier from Step 4 in the pipeline. Since that modifier deletes all selected elements regardless of type, it will remove both the selected mesh regions and the selected particles in one step.
Step 6: Show only bonds incident on the central particle
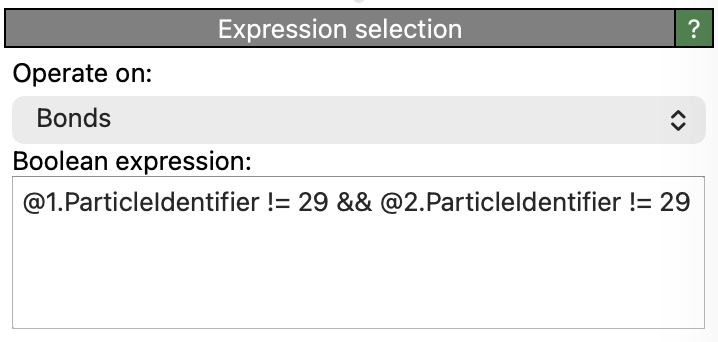
There may still be unwanted bonds visible in the scene. To clean up, we will remove all bonds that are not connected to the central particle.
Insert another Expression selection modifier before (below) the Delete selected modifier in the pipeline and set it to operate on Bonds. Enter the following Boolean expression:
@1.ParticleIdentifier != 29 && @2.ParticleIdentifier != 29
In bond selection mode, the prefixes @1. and @2. provide access to the properties of the two particles connected by each bond.
The expression above selects all bonds for which neither endpoint is particle 29 – in other words, bonds that are not incident on the central particle.
No additional Delete selected modifier is needed. The one already present at the end of the pipeline removes all currently selected elements – mesh regions, particles, and bonds – in a single step.
The final result shows the Voronoi cell of particle 29 together with the central atom, its nearest neighbors, and the bonds connecting them:
If you encounter any problems with this tutorial, please drop us an email at support@ovito.org to help us improve the instructions.