Viewport windows
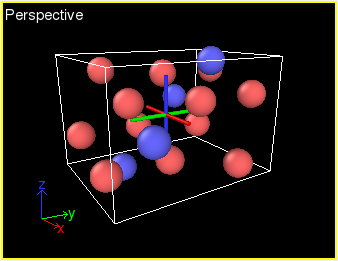
OVITO’s interactive viewport windows display the 3D visualization scene from different angles. Each viewport has a text caption (top-left corner) and an axis tripod (bottom-left corner) indicating the camera’s orientation relative to the global Cartesian coordinate system. The default 2×2 viewport layout can be customized to suit your needs.
Viewport toolbar

The toolbar below the viewports provides buttons for navigation modes and other useful functions, such as:
 Zoom Scene Extents
Adjusts the camera to fit all objects in the viewport. Hold Ctrl (Command on macOS) to apply this to all viewports.
 Maximize Active Viewport
Expands the active viewport to fill the window. Click again to restore the original layout.
Viewport menu
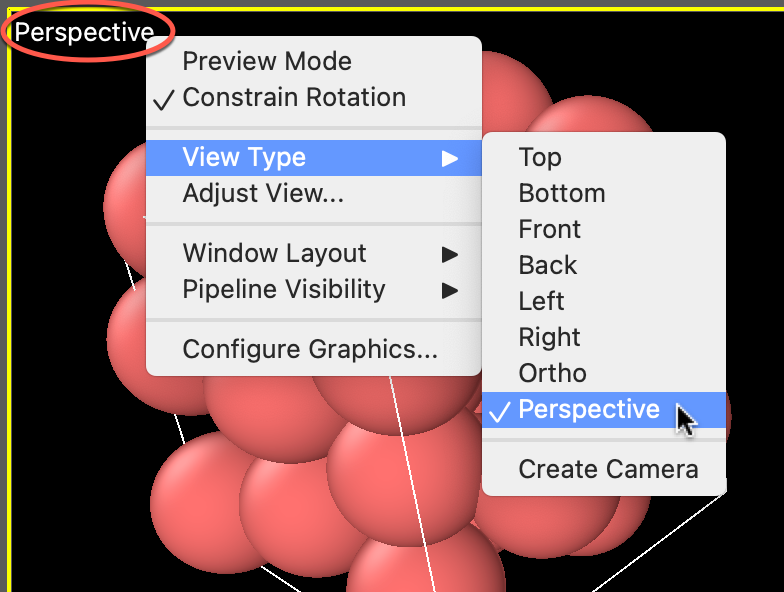
Click a viewport’s caption (“Perspective”, “Top”, etc.) in the top-left corner to open the viewport menu, which provides various options:
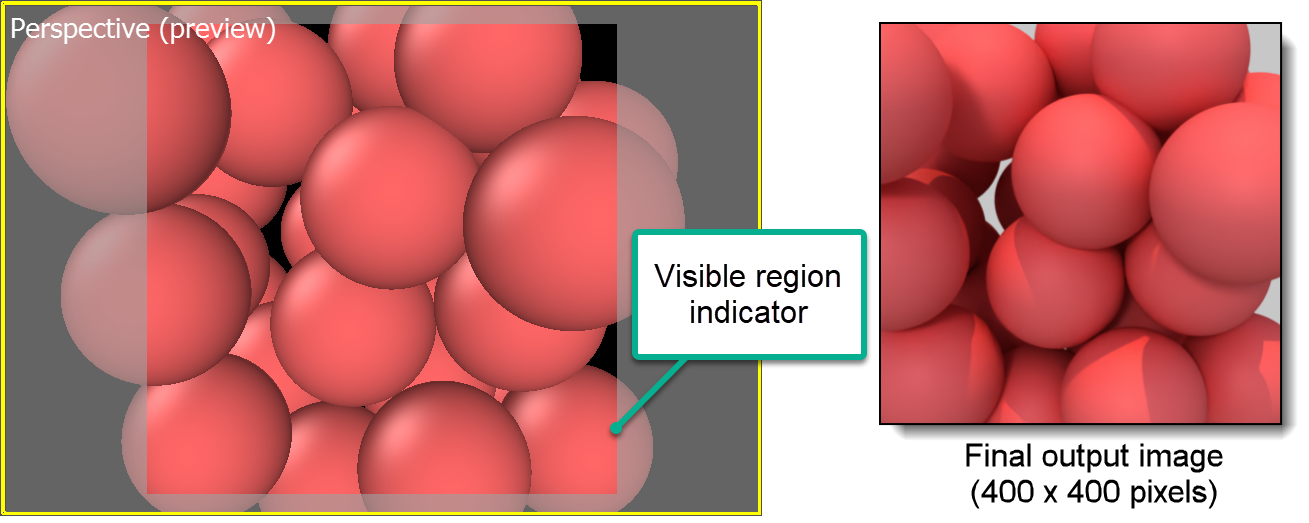
- Preview Mode
Displays a frame showing the visible area in rendered images. The frame’s aspect ratio matches the output image dimensions specified in the render settings:
- Constrain Rotation
Keeps the z-axis upright during camera rotation. You can change the constraint axis in the application settings.
- View Type
Switch between standard viewing directions and perspective/orthogonal projections.
- Create Camera
Adds a movable camera object to the scene, which is linked to the viewport. This allows for animated fly-by sequences via a camera motion path.
- Adjust View
Opens the Adjust View dialog for precise numeric control over the camera’s position and orientation.
- Window Layout
Modify the viewport window arrangement. OVITO defaults to a 2×2 grid but allows adding, removing, and resizing viewports. You can adjust individual viewports by dragging the separator lines between them. OVITO Pro also supports rendering multi-viewport images and animations.
- Pipeline Visibility
Control which data pipelines appear in each viewport. This is useful for comparative visualizations, allowing different models or visualizations in separate viewports. For details, see Visualizing multiple datasets and Controlling what is shown in the viewports.
- Configure Graphics
Opens the Viewport Graphics Configuration dialog, where you can adjust the real-time rendering method for interactive viewports.