Rendering
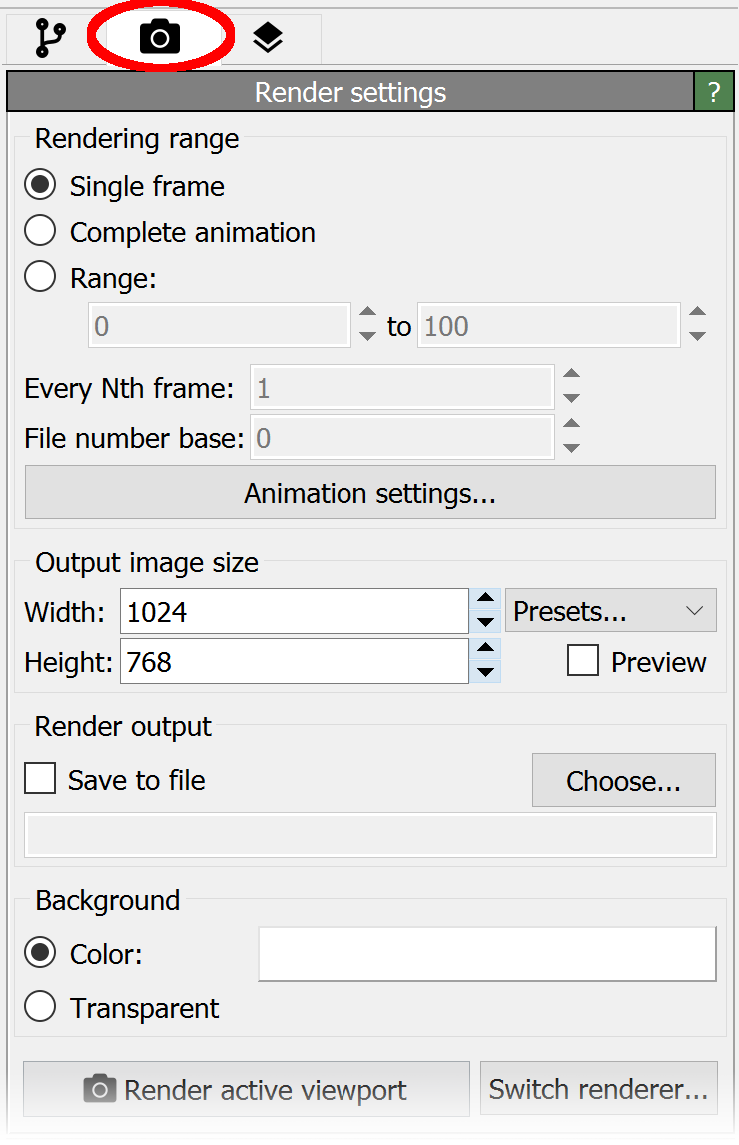
Once you have set up a data pipeline for analysis and visualization, you may want to generate high-quality images or animations for publications or presentations. This can be done from the Rendering tab in the command panel, as shown on the right.
To render the active viewport (indicated by a yellow border), click the Render active viewport button. OVITO will generate the image and display it in a separate window, where you can save it to disk or copy it to the clipboard.
The Render settings panel allows you to adjust rendering parameters, such as image resolution and background color. You can specify a filename in advance to save the rendered image or manually save it later once you’re satisfied with the result.
OVITO Pro offers multiple rendering engines, each optimized for different performance and quality needs:
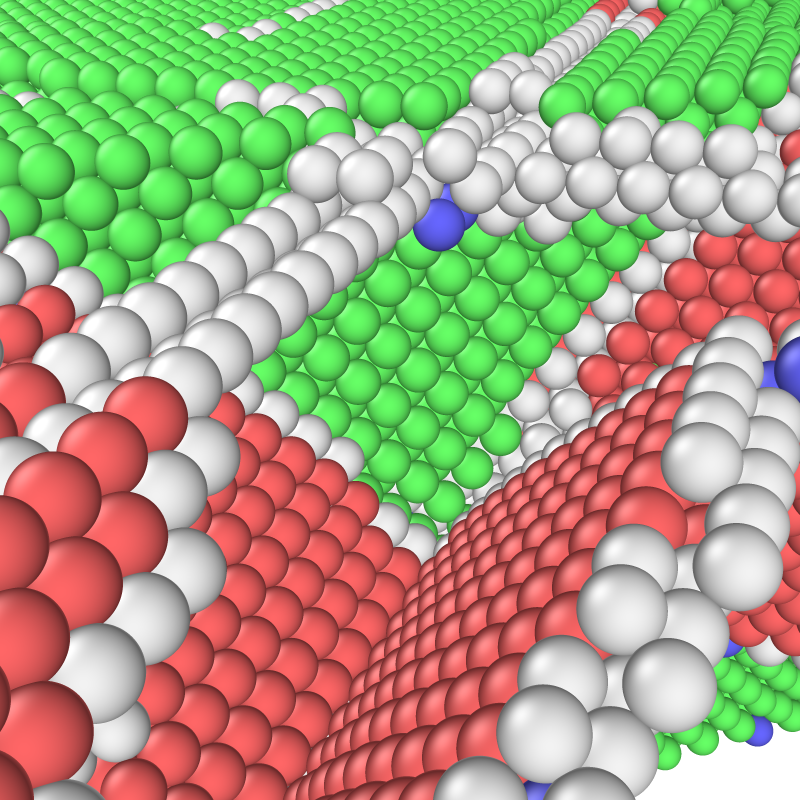
- OpenGL renderer:
The fastest option, producing images identical to the interactive viewports.
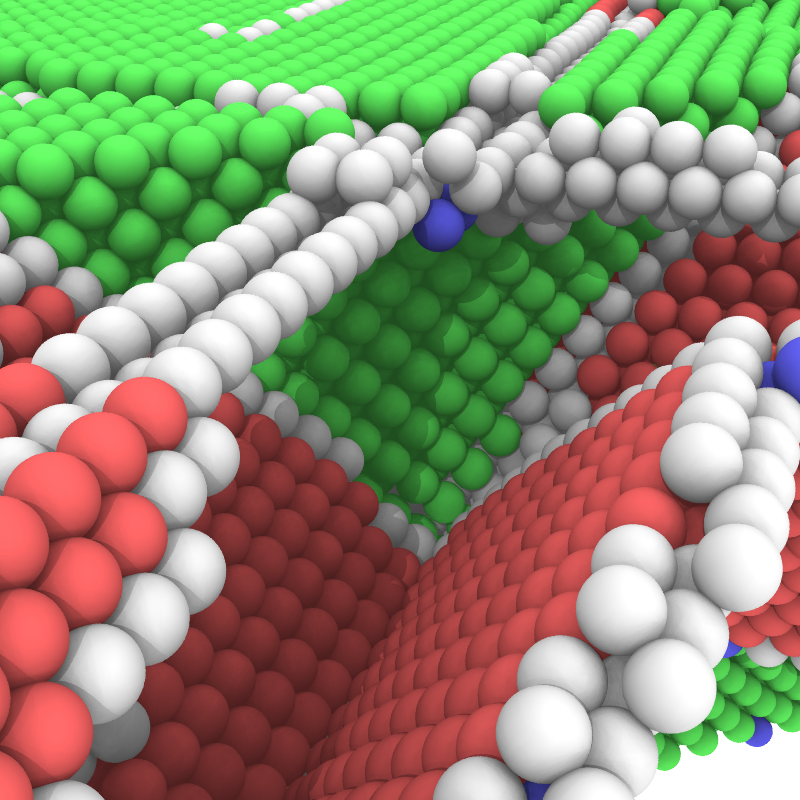
- Tachyon pro:
A software-based ray tracing engine capable of generating high-quality images with shadows, ambient occlusion, and depth of field.
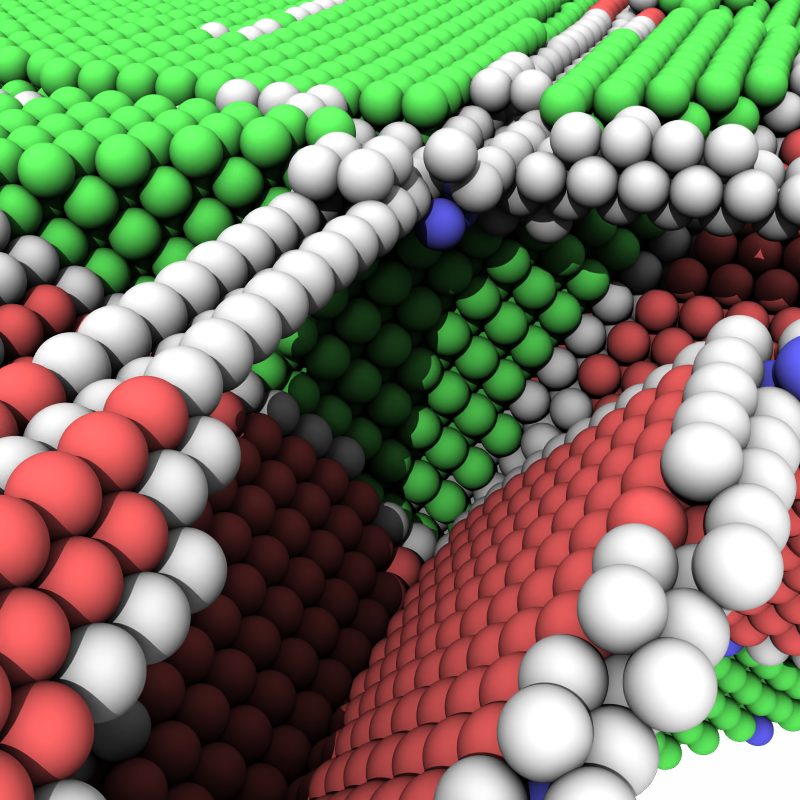
- OSPRay pro:
Another software-based ray tracer that enhances visual realism.
- VisRTX pro:
A hardware-accelerated ray tracing engine running on NVIDIA CUDA devices. Provides real-time rendering performance and can be used for interactive visualization instead of the default OpenGL renderer.
For more details, see Rendering in the reference section.
OpenGL renderer: |
Tachyon renderer: pro |
OSPRay renderer: pro |
VisRTX renderer: pro |
|---|---|---|---|
|
|
|
|

Creating animations
OVITO can render animations of simulation trajectories. To do this:
In the Render settings panel, select Complete animation.
Specify an output filename for the video.
Choose a frame rate in the Animation settings.
OVITO’s built-in video encoder supports formats such as AVI and MPEG. Alternatively, you can export individual frames as image files and use an external encoding tool, such as ffmpeg, to compile them into a video.