Branched and cloned pipelines pro
The Clone current pipeline function in OVITO Pro duplicates the selected data pipeline, enabling side-by-side visualization of multiple datasets or different views of the same dataset.
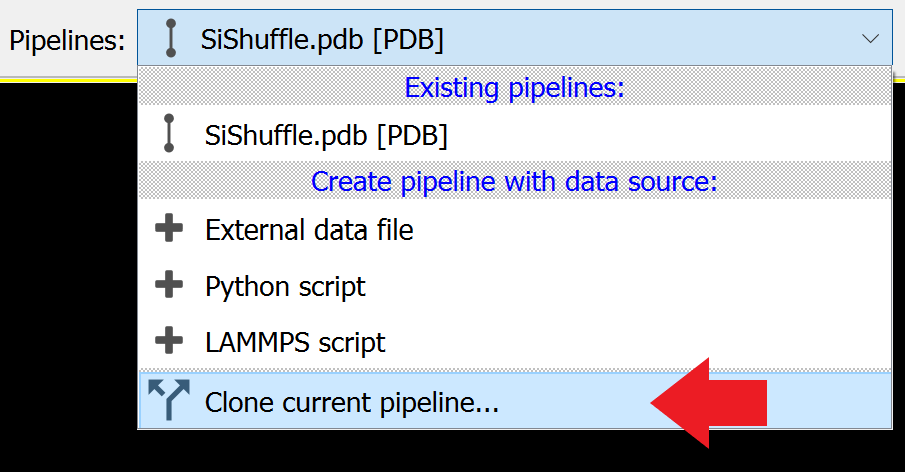
You can access this function from the pipeline selector in OVITO’s main toolbar. The Clone Pipeline dialog allows you to configure the cloning operation before executing it.
Once cloned, both pipelines appear in the visualization scene, and the viewports display two objects. The pipeline selector lets you select which of the pipelines is the active one shown in the pipeline editor. You can also select a pipeline by clicking on the corresponding object in the viewport.
How pipeline cloning works
A data pipeline in OVITO consists of a data source (typically a simulation output file) and a sequence of modifiers. The data source provides some input data (e.g., a particle-based model or other data objects), which the modifiers process sequentially. The final output is displayed in OVITO’s 3D viewports.
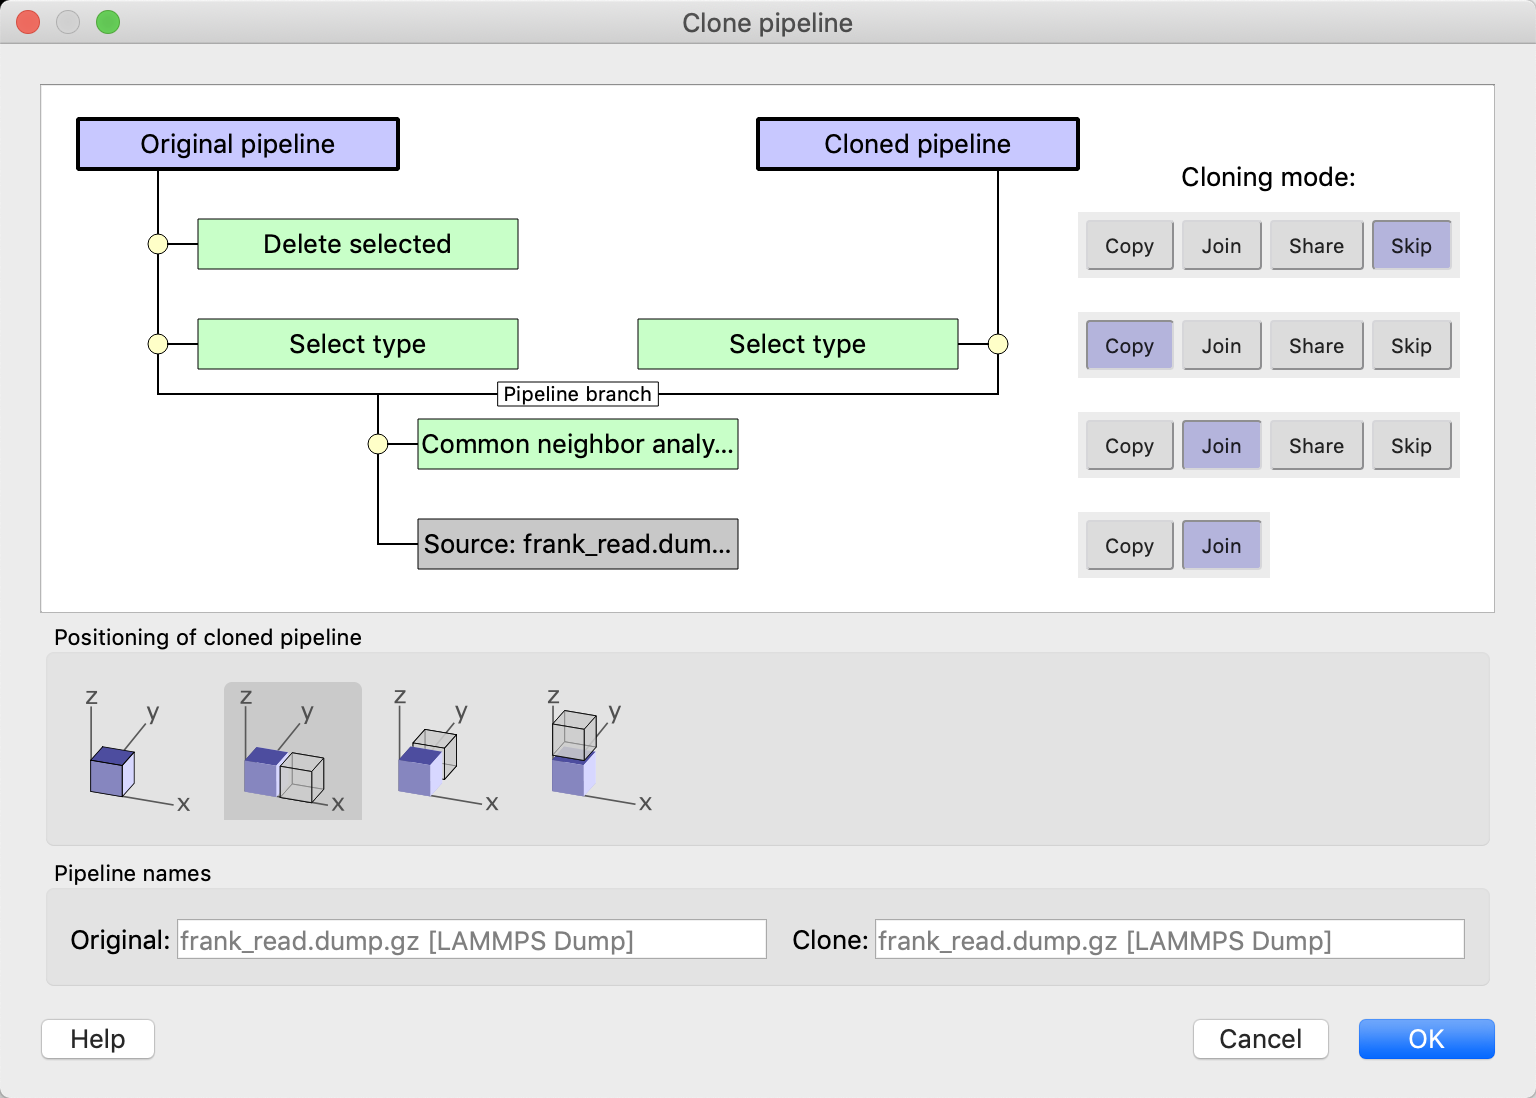
When cloning a pipeline, you can choose whether to copy or share the data source and the modifiers.
For the data source you have two options:
- Copy
The cloned pipeline gets its own copy of the input data. Changing the input file for one pipeline does not affect the other.
- Join
Both pipelines share the same input data, which gets loaded from the file only once. Changing the input file for one pipeline affects the other.
For each modifier in the original pipeline, you can choose between four cloning modes:
- Copy
Creates an independent copy of the modifier. Changes to the modifier in one pipeline do not affect the other.
- Join
Shares the data between the two pipelines, forming a branched pipeline. Up to the branching point, both pipelines share a common data flow and computations are performed only once. Beyond the branching point, the two pipelines operate independently.
- Share
Similar to Join, but allows different upstream data sources while keeping shared modifiers synchronized. In other words, the same modifier operates on different data in the two pipelines. Use this to visualize different data in the same way, e.g., by applying the same coloring scheme to two different datasets.
- Skip
Excludes a modifier in the cloned pipeline.
Additional options
Each pipeline’s output can be positioned independently in 3D space. The Clone Pipeline dialog provides displacement options along the x, y, or z-axis to prevent overlap of the original pipeline’s output with the cloned pipeline’s output.
Pipelines can be repositioned anytime using the Move and Rotate tools in the main toolbar of OVITO (see Positioning objects in the scene for details).
By default, OVITO names each pipeline after its input file. The Clone Pipeline dialog allows you to assign custom names for better differentiation between original and cloned pipelines. Scene pipelines are listed in the pipeline selector, which also allows you to rename pipelines later on.
After cloning a pipeline
Modifiers and data sources may be shared between pipelines, which can be difficult to keep track of. Let’s look at how OVITO’s user interface helps you recognize and manage shared and independent pipeline elements.
Consider this example with four modifiers cloned as follows:
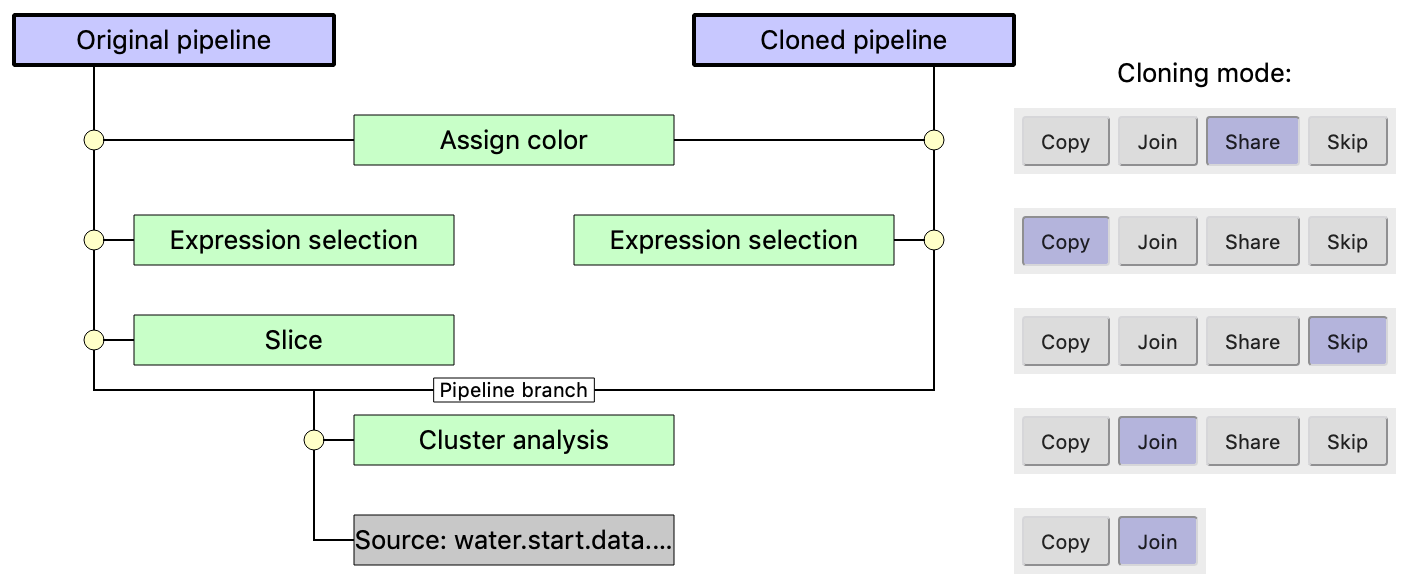
The data source and the Cluster analysis modifier use Join mode, meaning they form a common branch for both pipelines.
The Slice modifier is skipped in the cloned pipeline. Thus, after the branching point, one copy of the data will be sliced, while the other will not.
The Expression selection modifier is copied, allowing the creation of independent selections in each pipeline.
The Assign color modifier is shared, ensuring both pipelines apply the same color to their respective particle selections.
Sharing of pipeline stages
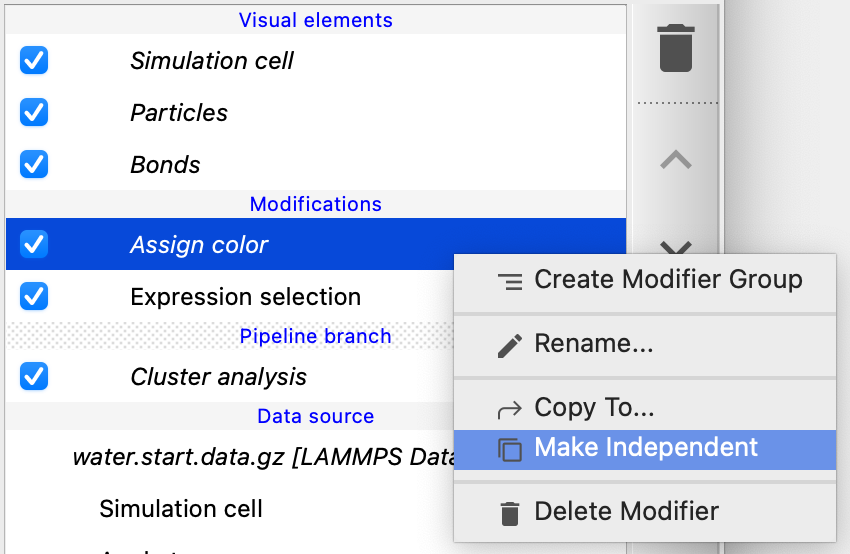
After executing the cloning operation, the pipeline editor displays the cloned pipeline. A horizontal Pipeline branch line marks a shared pipeline section. Inserting, removing, or changing modifiers below this line will affect both pipelines.
Items in italic indicate shared objects. For instance, changing the settings of the shared Assign color modifier updates both pipelines (even though the modifier is located after the branching point!).
If separate control is needed, right-click the modifier and select Make Independent to create a standalone copy. Now you can adjust the modifier’s settings independently in each pipeline.
Sharing of visual elements
Shared visual elements also appear in italic at the top of the pipeline editor. They are shared, because they originate from a common data source or modifier. Changing their settings thus affects the rendering of both pipeline outputs. You can use the function Make Independent on these visual elements to create independent copies if needed, i.e., if you don’t want their visual representations to be synchronized.
Copying modifiers between existing pipelines
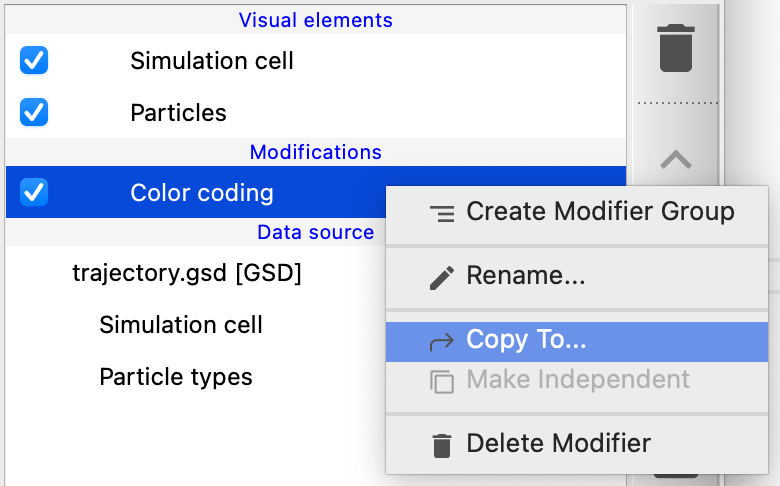
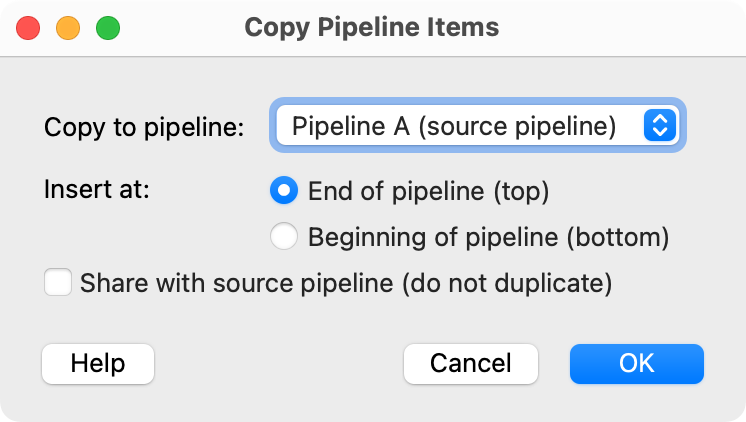
To copy a modifier between pipelines, right-click and select Copy To Pipeline…. A dialog box lets you choose:
The destination pipeline: This can be any pipeline in the scene, including the original pipeline.
The insertion position: Choose whether to insert the copied modifier at the beginning or the end of the destination pipeline.
The copying mode: Choose between Copy and Share with source pipeline.
You can use the copy function within the same pipeline to duplicate modifiers, e.g., to apply the same processing step(s) multiple times.
You can also copy the file source to another pipeline to let multiple pipelines share the same data source. In other words, you can merge two independent pipelines such that they will use the same input data and share a common upstream branch.
See also