Multi-viewport layouts
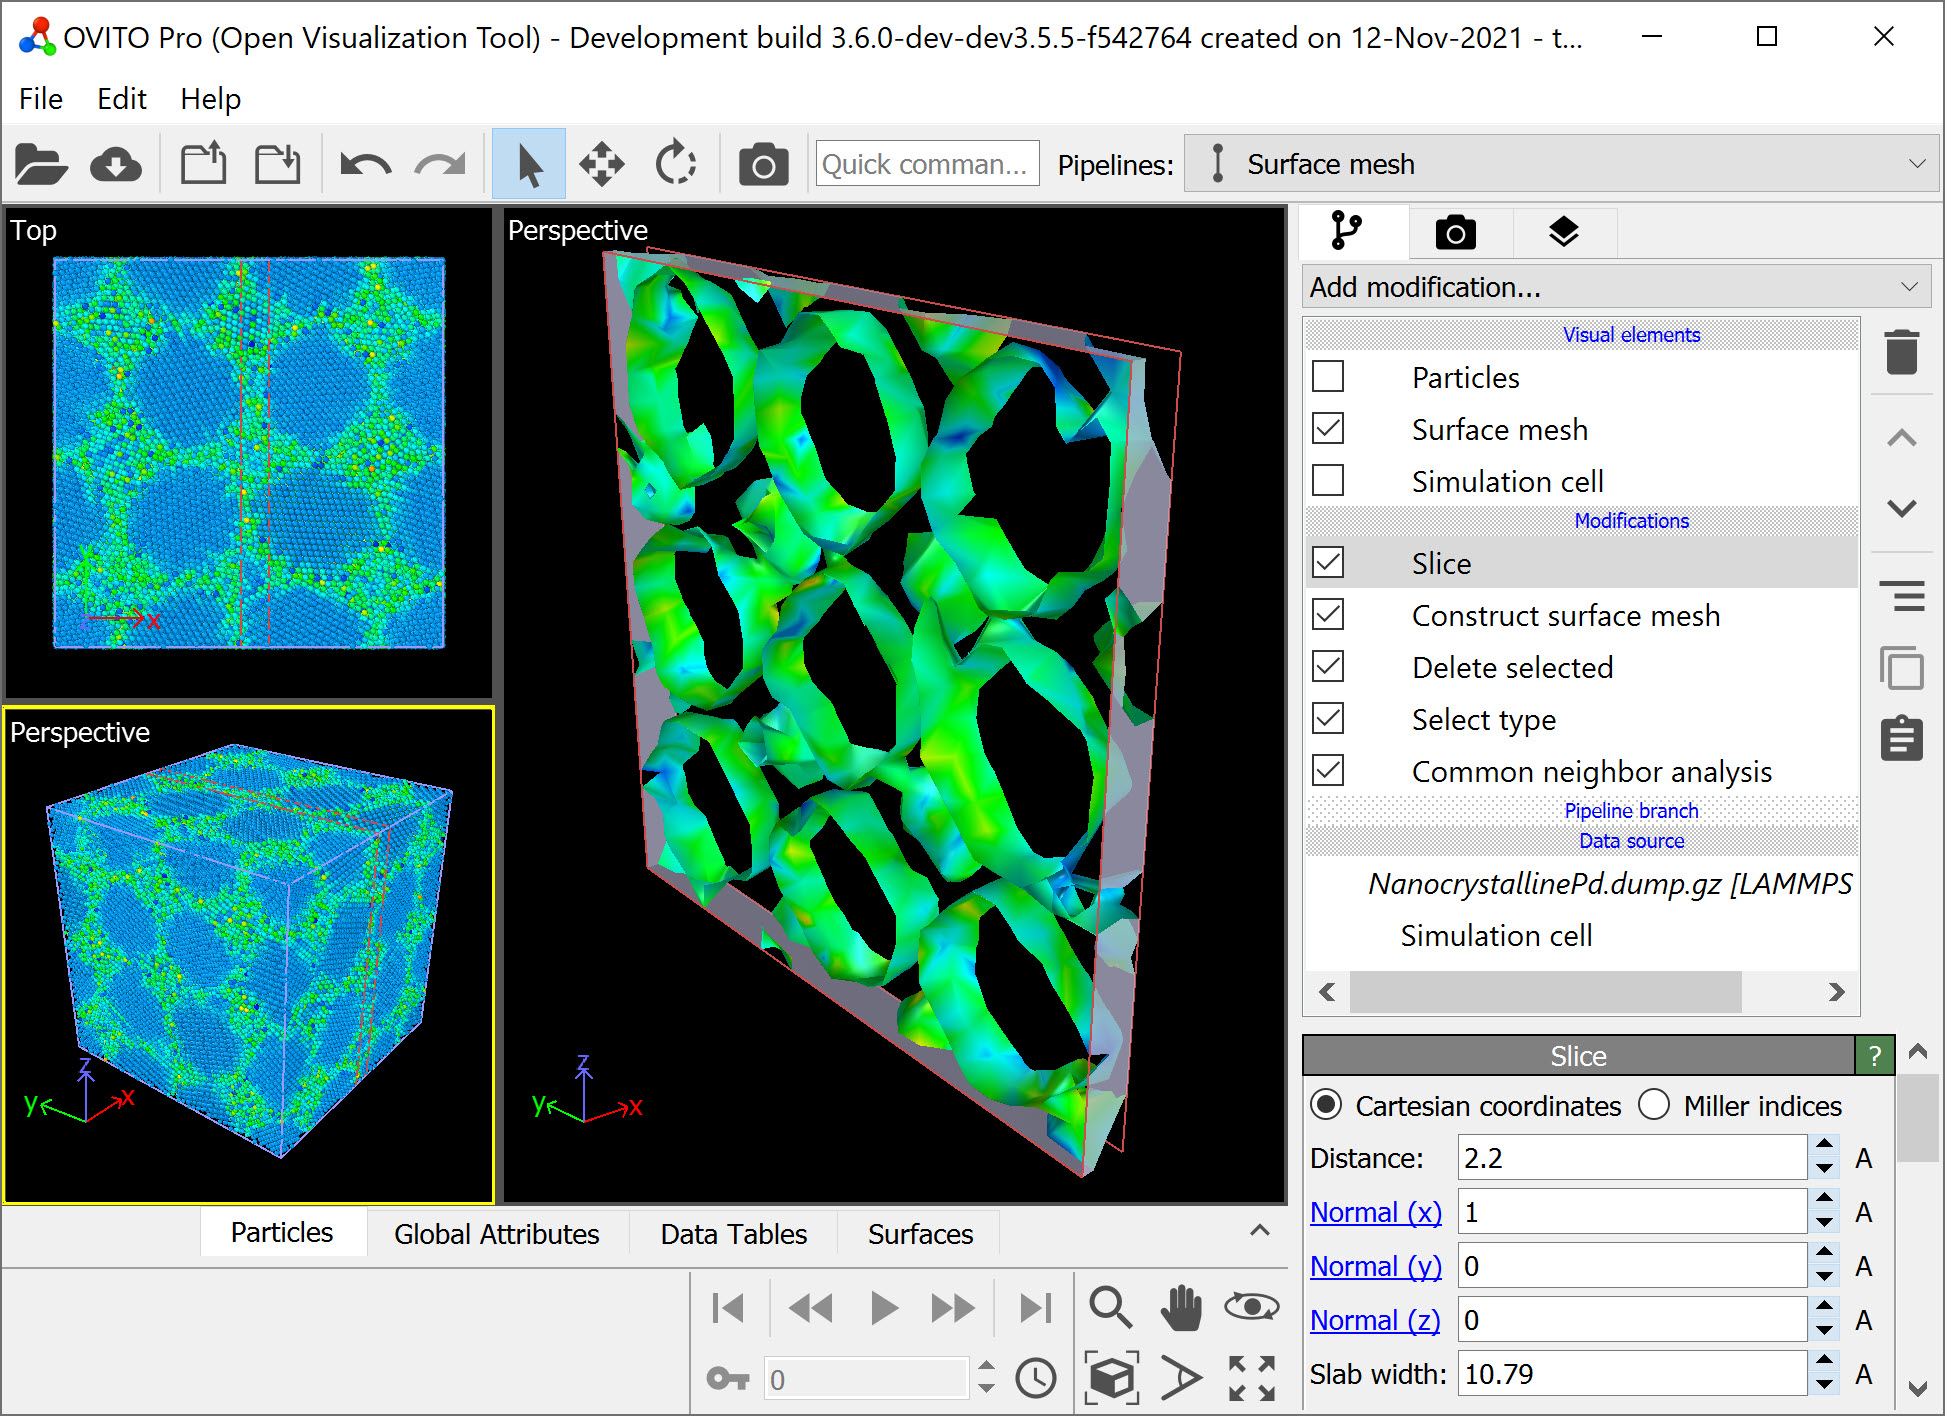
OVITO allows you to customize the default 2×2 layout of the interactive viewports to suit your needs. You can also import multiple datasets or use branched data pipelines to visualize different simulations or analysis results in separate viewports.
Customizing the viewport layout
The viewport layout consists of nested boxes, each subdivided either horizontally or vertically. Each sub-cell can contain another nested layout box or an actual viewport window. You can resize viewports by dragging the divider lines with the mouse.

Important: The multi-viewport layout is only visible when no viewport is maximized. To restore the full layout view, toggle the maximize button in the viewport toolbar.
To modify the layout, right-click on any blue divider line to open a context menu with options to:
Further subdivide a layout cell.
Remove a layout cell to merge adjacent viewports.
Reset the viewport sizes to their default proportions.
Additionally, left-click on a viewport’s caption text to access the viewport menu, where you can split a viewport into two sections or delete the viewport from the layout.
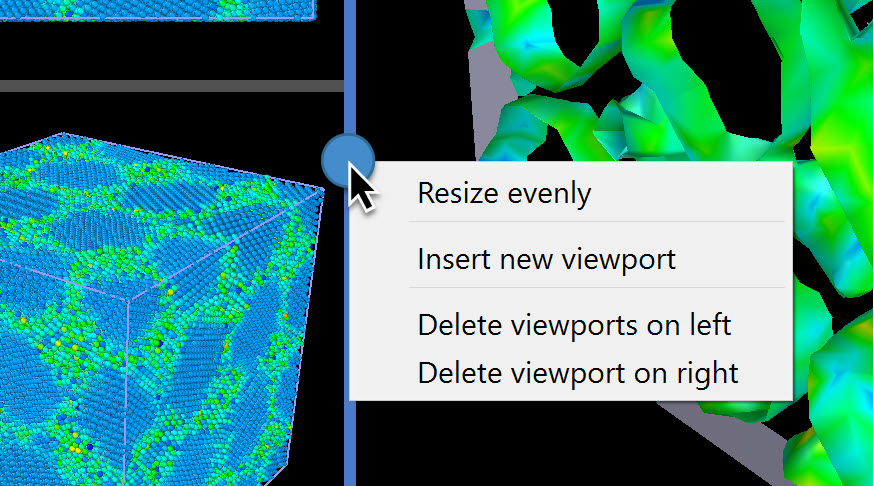
Right-click a divider line to access layout options.
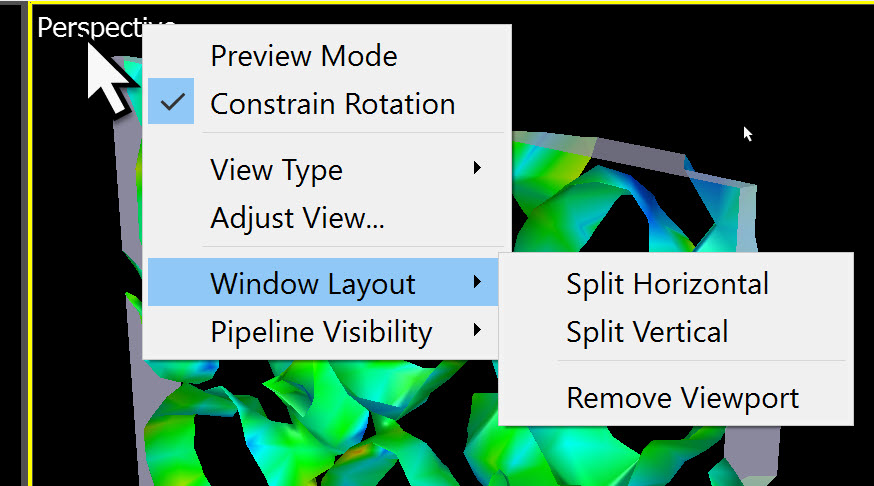
Left-click a viewport caption for additional options.
All layout modifications can be undone via .
Controlling what is shown in the viewports
By default, all viewports display the same scene from different camera angles. If multiple datasets or pipelines are loaded, they will appear in every viewport.
To control visibility on a per-viewport basis, use the function in the viewport menu. This lets you toggle individual pipelines in specific viewports, allowing different objects to be displayed in separate windows.
For more details, refer to the pipeline cloning section to learn how to duplicate a pipeline and modify its visualization style or input simulation file.
Rendering images or movies of a viewport layout pro
In OVITO Pro, the render settings panel includes the option Render all viewports, which allows you to capture the entire viewport layout in a rendered image or animation.
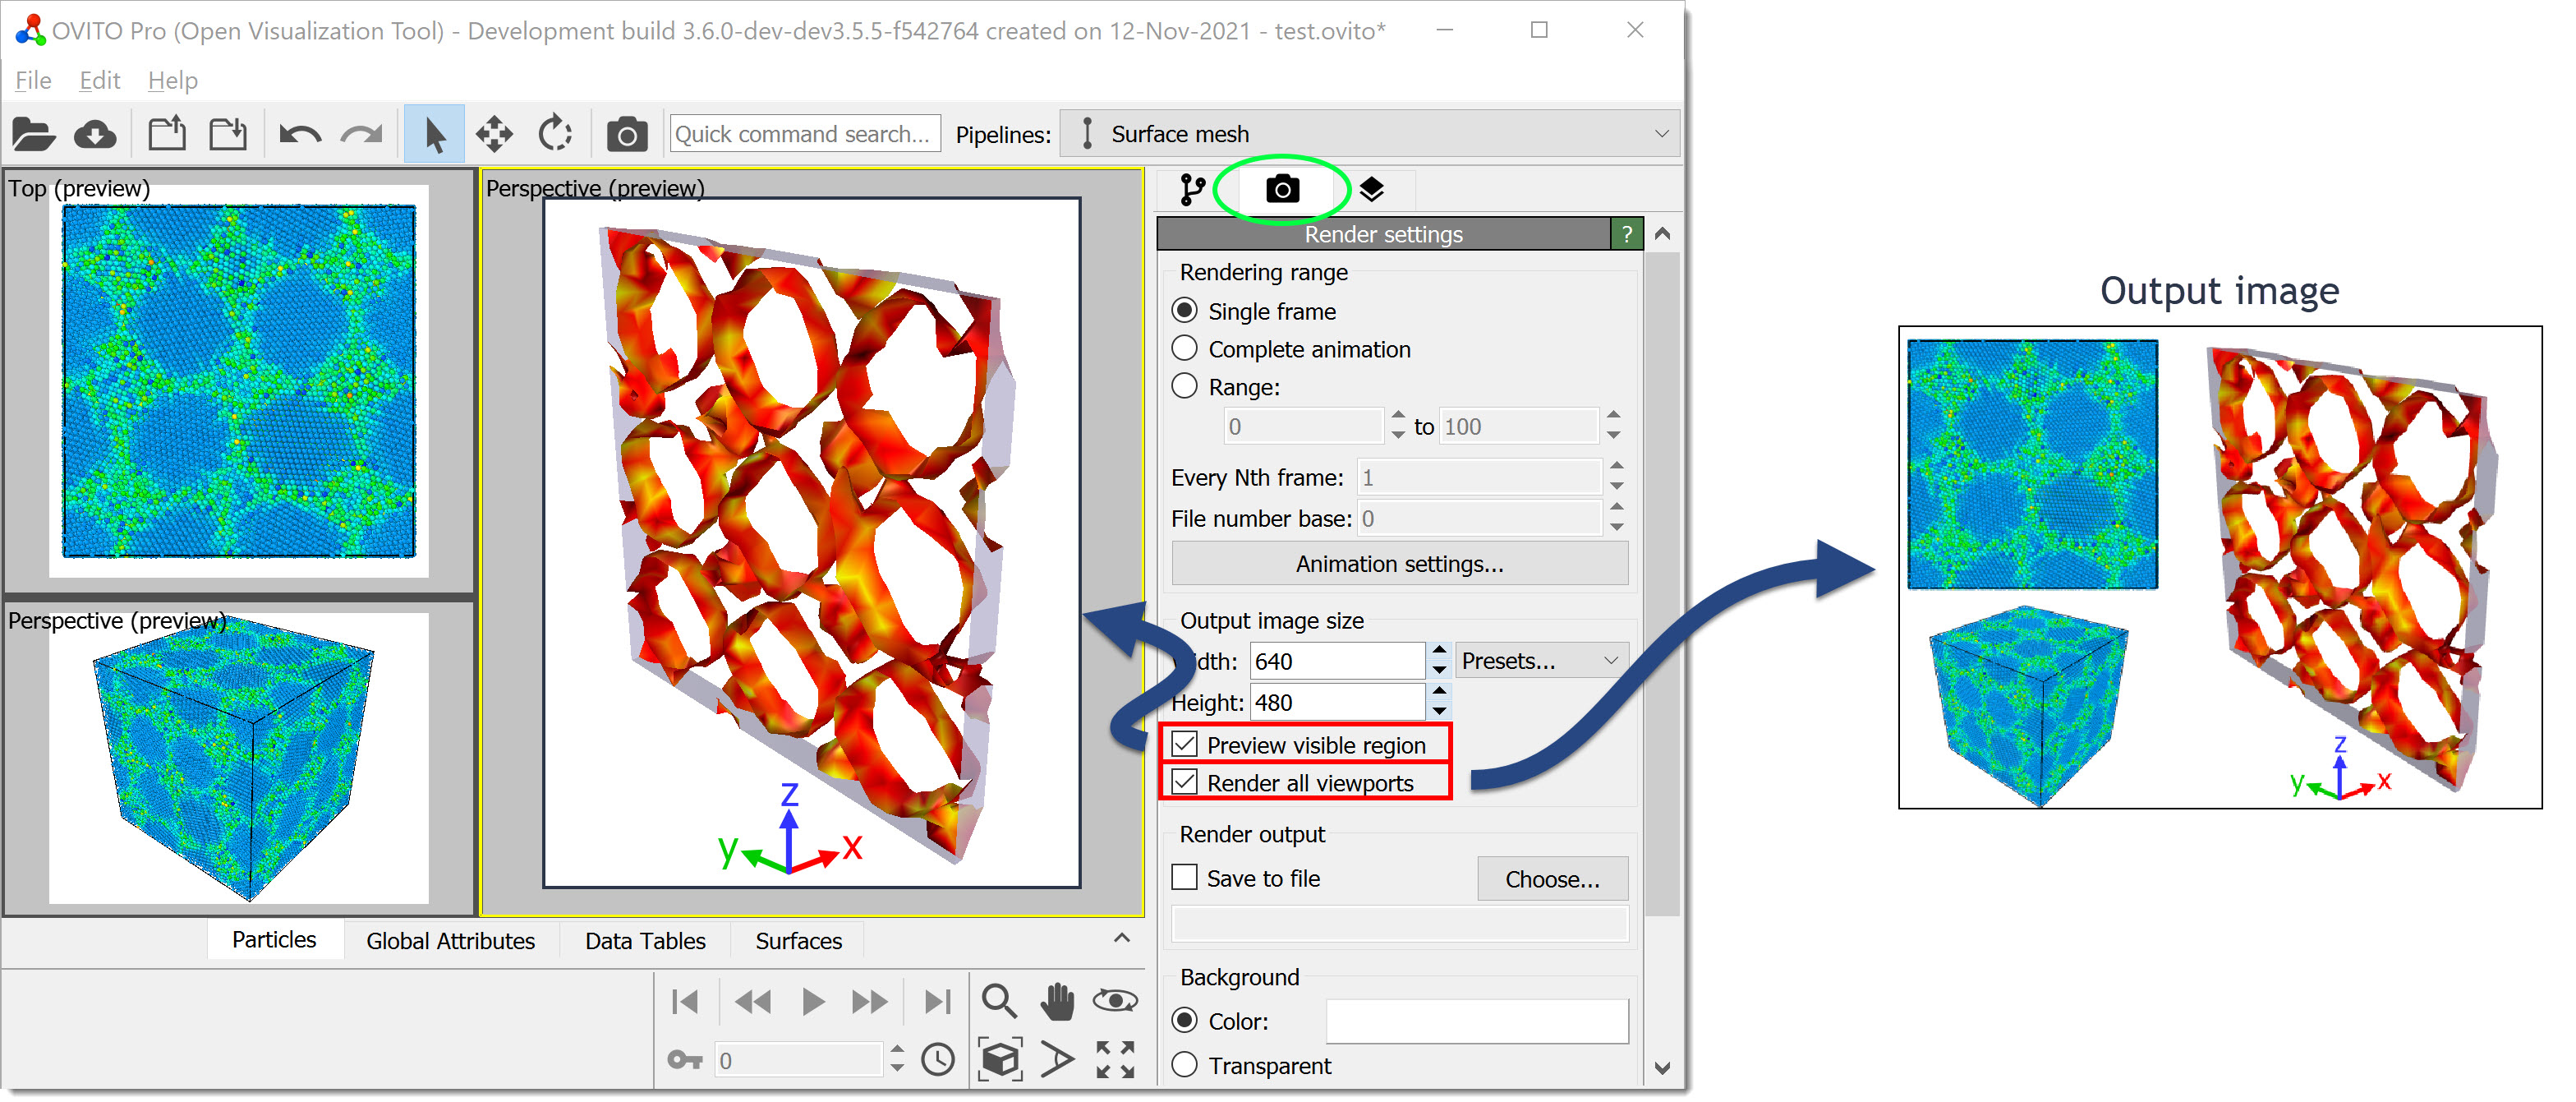
For better composition, enable Preview visible region to display guides in the interactive viewports, indicating the portions that will appear in the final render output.
Tip
To make your custom viewport layout the default in OVITO, refer to Customizing the initial program state.